Traverse Global v11.2
Users
Use the Users function on the SM Administration menu to create login accounts for users. After creating a login for users, you can set up Groups and permissions for users to control which groups of users can access which applications and functions.
When you create a user login, the new login is added to the available users to in the groups setup. You will select the check boxes in the group setup for the users to assign to the group. If you havegroups already set up you can also assign the users to groups in the user setup.
Creating a User
- Click the New button to open a blank user record.
- Enter the user name to use at the login screen in the User Name field. The user name is not case-sensitive when logging into Traverse.
Note: To select from groups or users connected to the same domain, use the ... button. The User Name, Domain, and Group fields populate and the Is Trusted check box is automatically selected. - Enter the password to associate with the user name in the Password field. The password is case-sensitive when logging into Traverse.
Note: If the user is using Windows authentication, check the Is Trusted check box, then enter the Windows login in the User Name field (it is not necessary to enter the domain name in the field). - Select the Is Active check box, if the user is currently active and should have access to Traverse.
- Select the companies the user should have access to in the Company section.
- Select the groups the user should have access to in the Group section.
- Click the Apply button to save the new user.
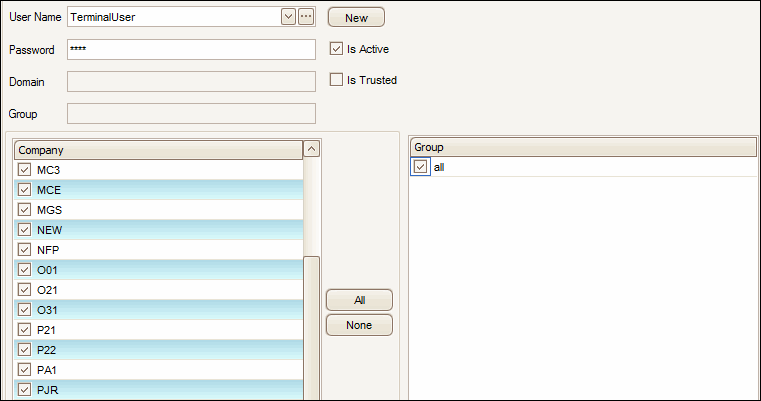
You must configure a Traverse user account for the Point Of Sale (POS) terminals to use to connect to the Traverse databases.
- Open the Users function from the System Manager Administration menu.
- Click the New button to open a blank user record.
- Enter the user name the POS terminals should use to log into Traverse in the User Name field. You may wish to use a name that helps to identify the user as a terminal user.

- Enter the password to associate with the user name in the Password field.
- Select the Is Active check box, if the user is currently active and should have access to Traverse.
- Select the companies the user should have access to, from the Company section
- Select the groups the user should have access to, from the Group section.
- Click the Apply button to save the new user.
- Select a user to edit from the User Name field.
- Edit the fields as necessary.
- Click the Apply button to save any changes made to the user.
Editing a User
- Select a user to edit from the User Name field.
- Edit the fields as necessary.
- Click the Apply button to save any changes made to the user.
Deleting a User
- Select a user to delete from the User Name field.
- Click the Delete button to delete the selected user.
- Click Yes at the "Are you sure you want to delete the user?" prompt.